How to mix vocals successfully


Mixing Vocals In A Home Studio Environment
Do you want to learn how to mix voices simply and successfully without expensive software? This page is for DIY musicians and independent artists using basic software and is written from my own experience. It tells you how to mix good quality vocals without equipment coasting millions! How do you get recorded vocals to sound good?
Perhaps the hardest aspect of DIY recording is to get your voice to sound good and stand out without being strident. This is especially vital when vocal mixing for folk music which needs clarity and sensitivity. Here I will show you how to produce a good vocal without getting too techy. It IS possible to get a great sound without spending a fortune on gear. In particular I will show how I mixed the song, St Francis' Prayer.
This account is aimed at ordinary musicians, not industry experts. It gives some useful tips to other DIY music producers in a non-techy way!I hope you will enjoy it and find it useful or interesting!
Recording Your Vocals
What you need to record vocals.
Recording a good voice track presupposes several facts:
You must have backing ready or you will be out of time!
You need headphones as sound from the backing track will spill into the voice if you use speakers.
A good microphone, on a stand, in a quiet room is a must.
A "pop screen" is useful!
Either a digital studio or an interface for your computer is necessary.
The route I choose is as follows, a good condenser microphone with a professional quality pop screen into a digital portastudio. If you want to save on equipment costs, you can make a pop screen by stretching nylon tights over a coat hanger. I have done it, but it does lose some clarity whereas the pop screen does not.
Pop Screens - Essential for a clean sound
When recording and mixing your own song, a pop screen is a must for cutting out explosive consonants - such as "b" "t" and "p" - from your recording. These air sounds can be ugly and spoil your track. Compression tends to make them more rather than less obvious, but a good pop screen will prevent the worst air sounds.
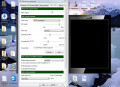
The Recording Hardware I Use
Recording with a digital studio
I use a 24 track portastudio. Any orchestral backing I want is produced with Sibelius software and its onboard synth. I use the sib track purely as a guide track to sing along to (a la karaoke!) importing it from the computer onto the studio.
Vocals and live instruments are then recorded and exported to a mixer programme on my computer. I could mix directly with the studio, but I find exporting to NCH Mix Pad works well for me. This is a very cheap but reliable programme which is easy for someone who is not a "tech head" to use.
I also use Wave Pad (part of the package) to edit any individual parts, amplify, add effects or EQ before loading to Mix Pad.
This set up works well for me. It is a lot cheaper than Pro-Tools or Cubase as my focus is on the music not the industry specifications. I know of professionals who also use Sony Acid and Audacity freeware programmes. It need not be expensive to mix sounds!

Tascam 24 track Digital Portastudio - A quality tool for home recording and demo CDs
I have used the Tascam 2488 extensively and can recommend it to readers. The only drawback I found was the manual which does not specify the codecs supported by the import and export WAV functions in an obvious way. I had to discover that by trial and error. After that point it became easier to use with the computer!
Raw Track Without Cleaning Or Compression - The Starting Point For Editing Your Vocals
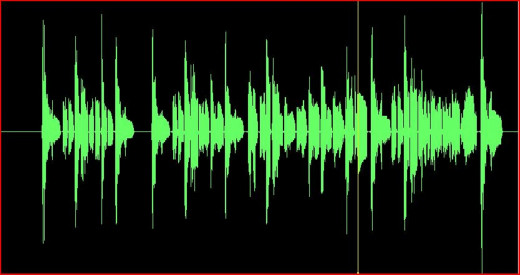
As you can see, this wave form is very spiky. You can also perhaps see little spikes and oddities between phrases? This will not sound balanced or clean.
Edit Your Vocal Now - How to clean a track before mixing - easy method....
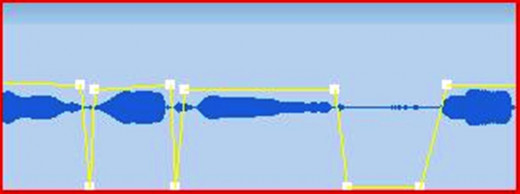
To get singing to sound good it is necessary to edit it first! However well you sing there will be problems with background noise, breath and mouth sounds and varying levels. If you have a good condenser microphone it will pick all these things up and now is the stage to get rid of them. Here is how you do it.
Take your vocal track into your computer editing programme (Mix Pad for me) listen carefully for unwanted sounds, heavy breathing or rumble between verses, overly loud consonants, gasps for air.... All lovely stuff!
Listen carefully to it at high volume. Where a problem occurs, "cut a notch" into the track using the increase and decrease decibel line. Listen again carefully. If you have lost part of a word, move the line until it is back again. Take time over this process - it is boring and longwinded and listening to unaccompanied voice can suck, but it is vital!
Using Compression - How compression changes your voice
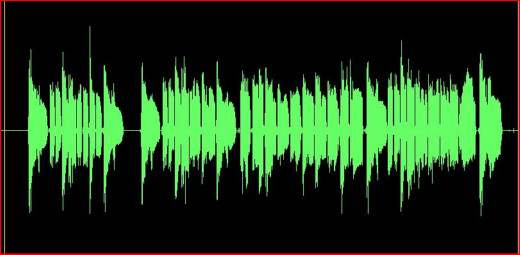
When you are satisfied, compress it. This gets rid of unintentional peaks and troughs from your performance or proximity to the microphone changing. Some producers compress multiple times. I do it once. This preserves the natural sound of my voice.
Too much compression makes singing sound woolly and out of tune I find. Too little makes the track distort and bounce a lot. I compress in a low ratio and use as little as I can get away with, you decide how much you like.... It is personal.
Save as Vocal1compressed. Keep this for back up!
After compression, you may wish to tune it. Do not use a global tuner unless you want the robot effect! If you have Melodyne, use it to find any notes that are audibly off key and tune them individually.
Save as Vocal1comptune.
If you are going to add reverb prior to mixing, add it to your track as required and Save as Vocal1comtunereverb.
You are now ready to add your vocals to the mix.
Keep the non reverb track!
Buy Vocal Tuning Software Here - The Music Industry's Secret Weapon
Of course you don't need this software if you are a fantastic singer who never goes off key or if you are happy to make dozens of takes and cut and paste the best! You don't need this software for rough edged vocals in a heavy metal setting. You don't need it if your ear doesn't tell you you are out of tune or if your tuning errors don't make you cringe.... Your audience might appreciate it though....

Where To Pan Singing In The Mix
Centering your voice!
Panning instruments is to give separation to the various tracks and some depth to your song. The established place for lead singer is the centre along with the drum track. This puts you right in front of the rest of the band.
Now you know why it is so necessary to clean up the track! What I do with my singing is place it in several positions. I do this because I have a pure, some would say folky voice. I do not have much "edge" so I want to enduce a gentle chorus effect. A pure sound can cut through without being strident in this way.
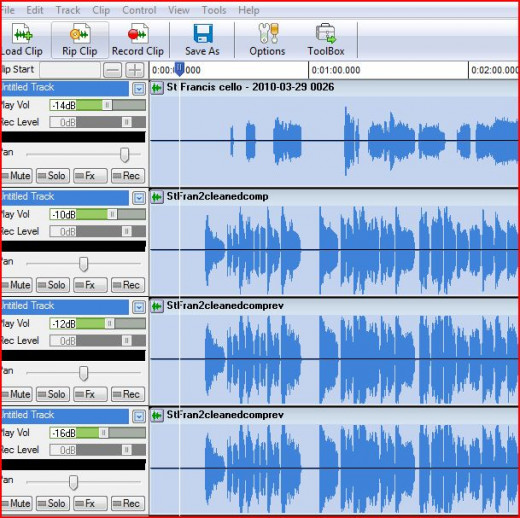
With St Francis Prayer I followed this pattern:
Centre vocal with reverb, minus12dB
Centre vocal dry, minus 10dB
Left of centre vocal reverb, minus 16dB
Right of centre vocal reverb, minus 16dB
The minus values were necessary to avoid being out of balance with the instruments or the track distorting. I tend to put minus values on everything - not just vocals - until the volume indicator only redlines very slightly. I do not believe music has to be loud to be good - if it sounds good quiet it can be amplified but bad music will only sound awful when louder!
I guess this is all I have to say for now and you must be the decider as to whether it worked in this particular song, so for my last paragraph or two you can check out St Francis Prayer....
Happy Easter and good luck with your recording!
St Francis Prayer - This is the song talked about here
I am most proud of this, as I did everything on the song from scratch.

Please let me know if you have found this lens interesting or useful.